Tub to Walk-In Shower · NYC

Bathtub to Walk-In Shower Conversion — Safe, Easy and Waterproof

Stepping over a tub wall gets harder every year. We take out the tub and build a fully waterproofed walk-in shower with a low, easy entrance — safer for seniors, for anyone with limited mobility, and simply nicer for everyone.

  • No tub wall to step over
  • Low or flush entrance where possible
  • Grab bars, bench, handheld shower
  • Matching tile, or a new accent design
  • 3-year workmanship warranty
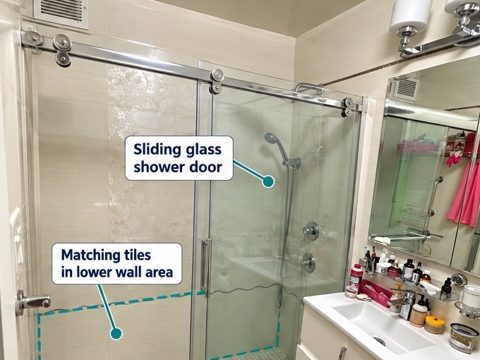
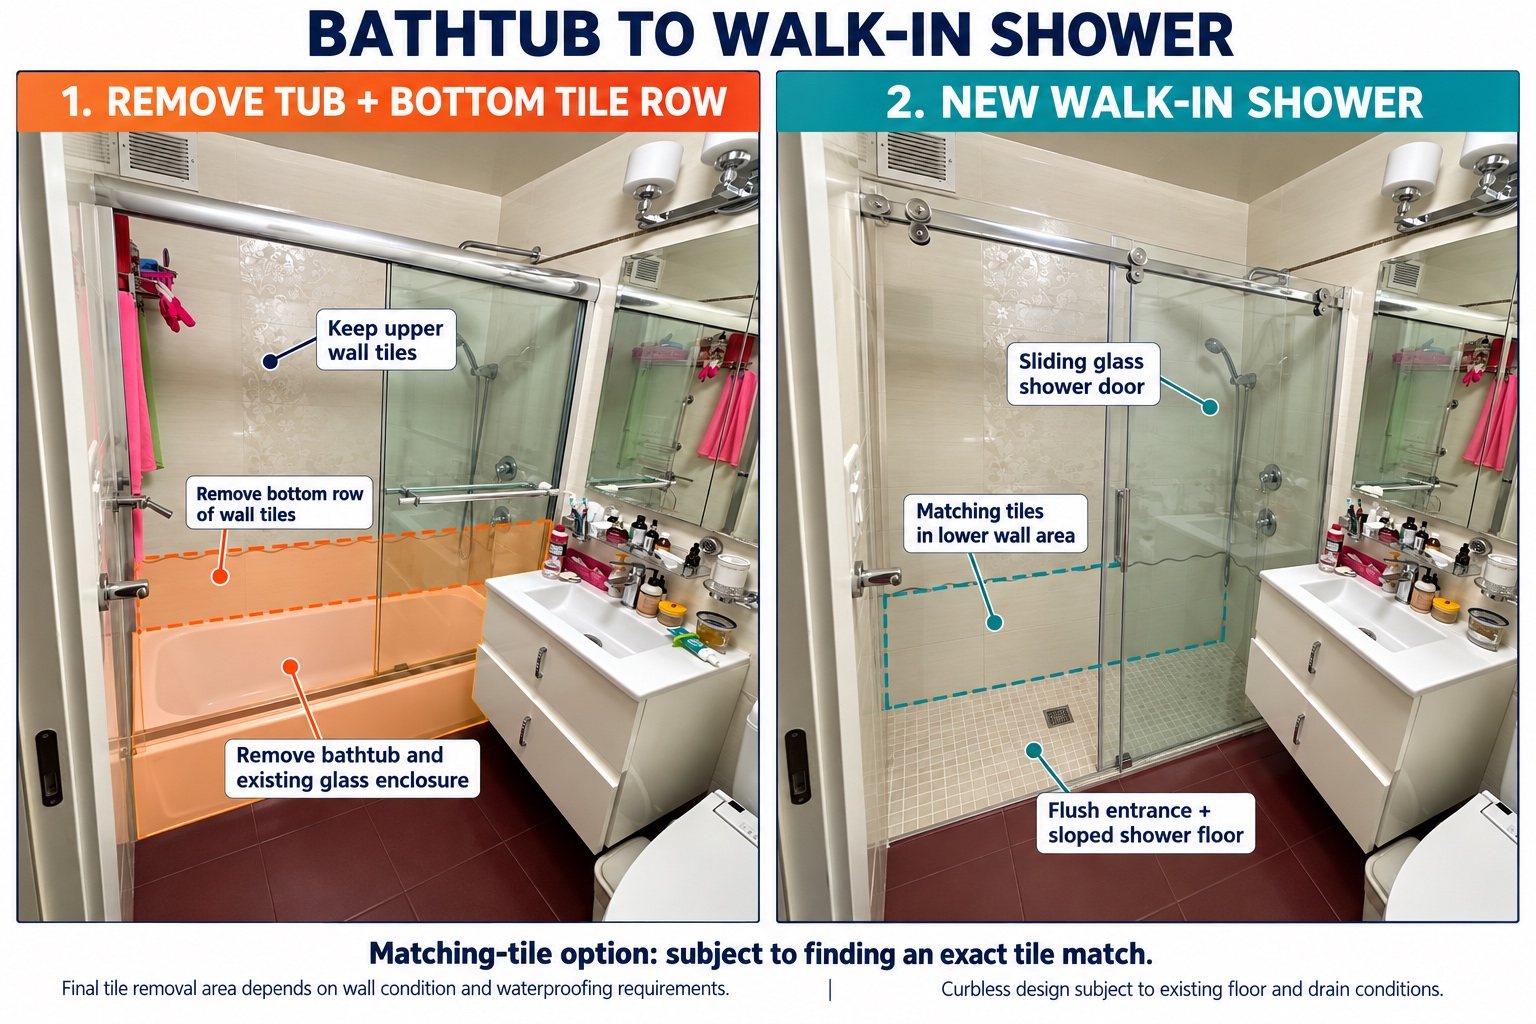
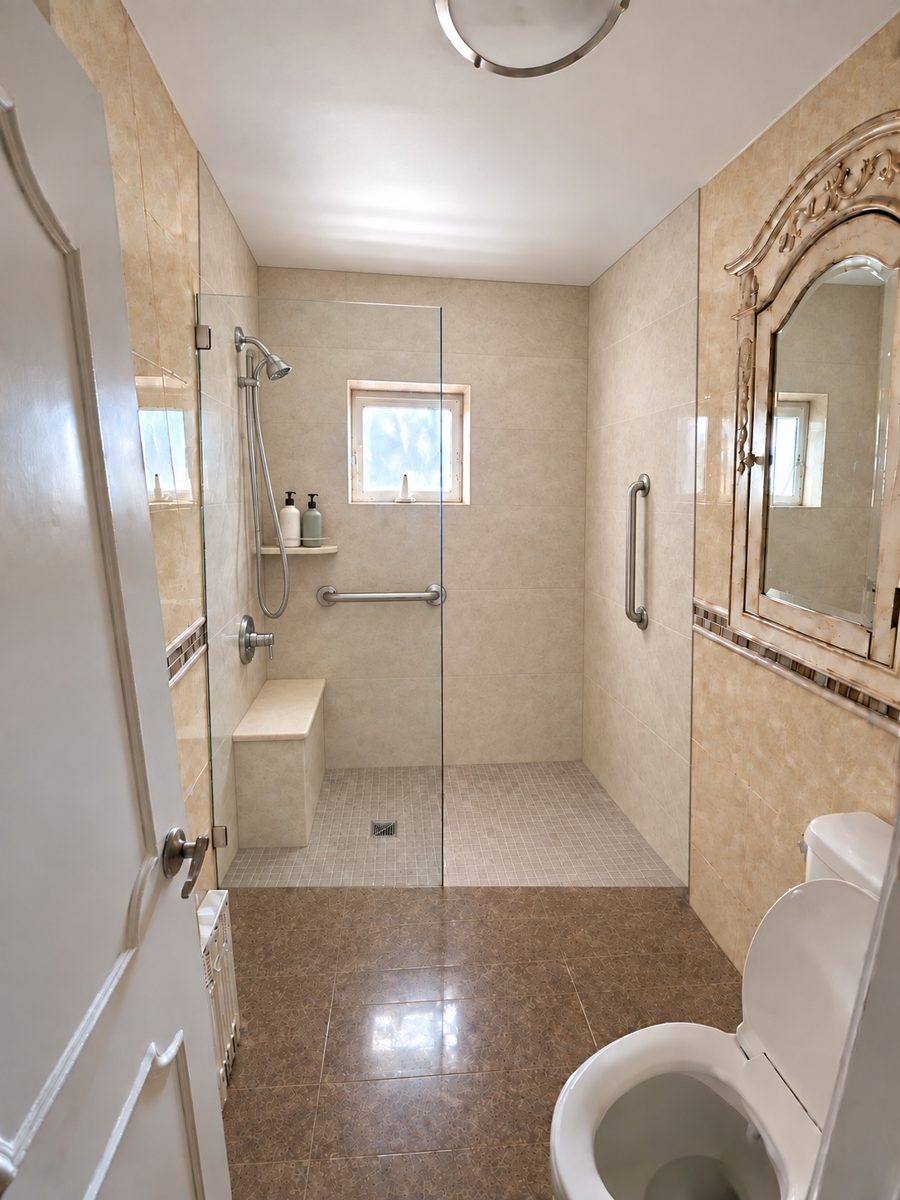
Bathtub to walk-in shower conversion in an NYC bathroom: tub and bottom tile row removed, then a new walk-in shower with glass door

Before and after: the tub comes out, a walk-in shower goes in.

At a glance

Bathtub to walk-in shower with Sani Building Corp

What it is
We remove the bathtub and build a fully waterproofed walk-in shower with a low or flush entrance where the floor and drain allow.
Best for
Seniors, people with limited mobility, recovery after surgery, and anyone who never uses the tub.
Two ways
Keep the upper wall tile and continue with a matching tile (small tile such as subway), or replace the tile on all three shower walls with a new design.
Safety extras
Grab bars, a shower bench, a handheld shower and slip-resistant floor tile.
How long
Keeping the upper walls is the faster option. You get the schedule in writing with the price.
Where
All five NYC boroughs — Brooklyn, Manhattan, Queens, the Bronx and Staten Island — plus Long Island and Nassau County.
Guarantee
Fully insured, 3-year workmanship warranty, insurance certificate (COI) for your building on request.
Since 2015Serving NYC homes and businesses
4.9 ★ on GoogleRated by real customers
Fully insuredCOI for your building on request
3-year warrantyOn our workmanship
One crewStart to finish, no hand-offs
Written priceFree estimate within 24 hours

Questions? Call (332) 277-0990 or send photos for a free estimate.

Who it is for

Is a walk-in shower right for you?

Most of our customers convert for one of these reasons.

Seniors
Stay safe and independent at home — no climbing over a tub
Limited mobility
A low, wide entrance, grab bars and a seat where you need them
After an injury or surgery
Easier, safer showers while you recover, and after
You never use the tub
More open space and a modern bathroom
Old leaking tub area
New waterproofing behind the walls and under the floor
Selling or renting
A walk-in shower is one of the most wanted bathroom upgrades
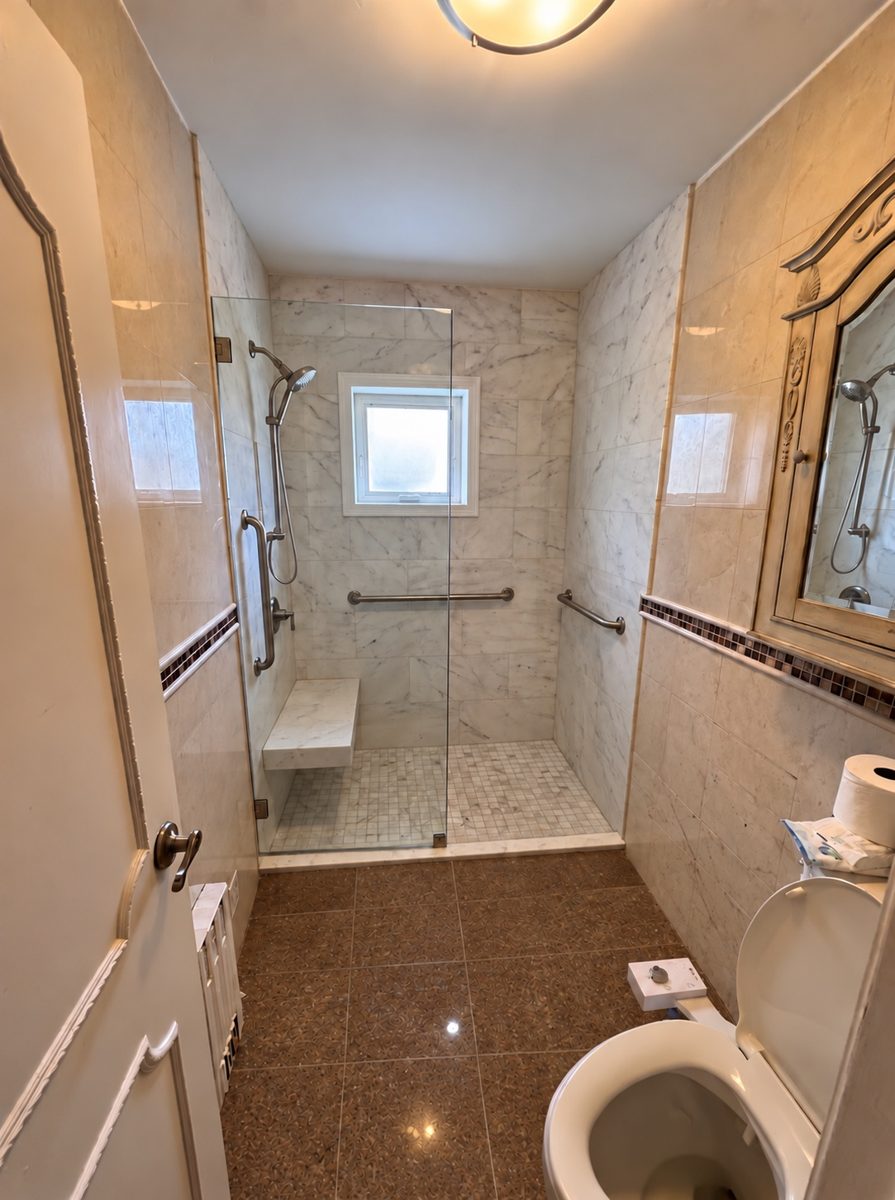
Senior-friendly walk-in shower with grab bars, a built-in bench and a handheld shower in an NYC bathroom
Grab bars, a bench and a handheld shower.
Low-entry walk-in shower with glass door and grab bar after a bathtub conversion
A low, easy entrance where the tub used to be.
Two ways we convert

Keep your walls, or new walls?

It depends on the tile you have now. We check it at the free estimate — or send us a photo of your tub wall and we will tell you.

Option 1 · Faster, lower cost

Keep the upper wall tile

We remove the tub and only the bottom rows of wall tile, build and waterproof the new shower floor and lower walls, and continue with a matching tile. Your upper walls stay as they are.

Works when: your wall tile is small, like subway tile or small squares, and we can find an exact or very close match.

Why remove the bottom tile row?

A bathtub has a raised edge, called the flange, that is fastened to the wall and hidden behind the bottom row of tile. The tub cannot come out without reaching it. Removing only that row lets us release the tub cleanly and protects the tiles above it.
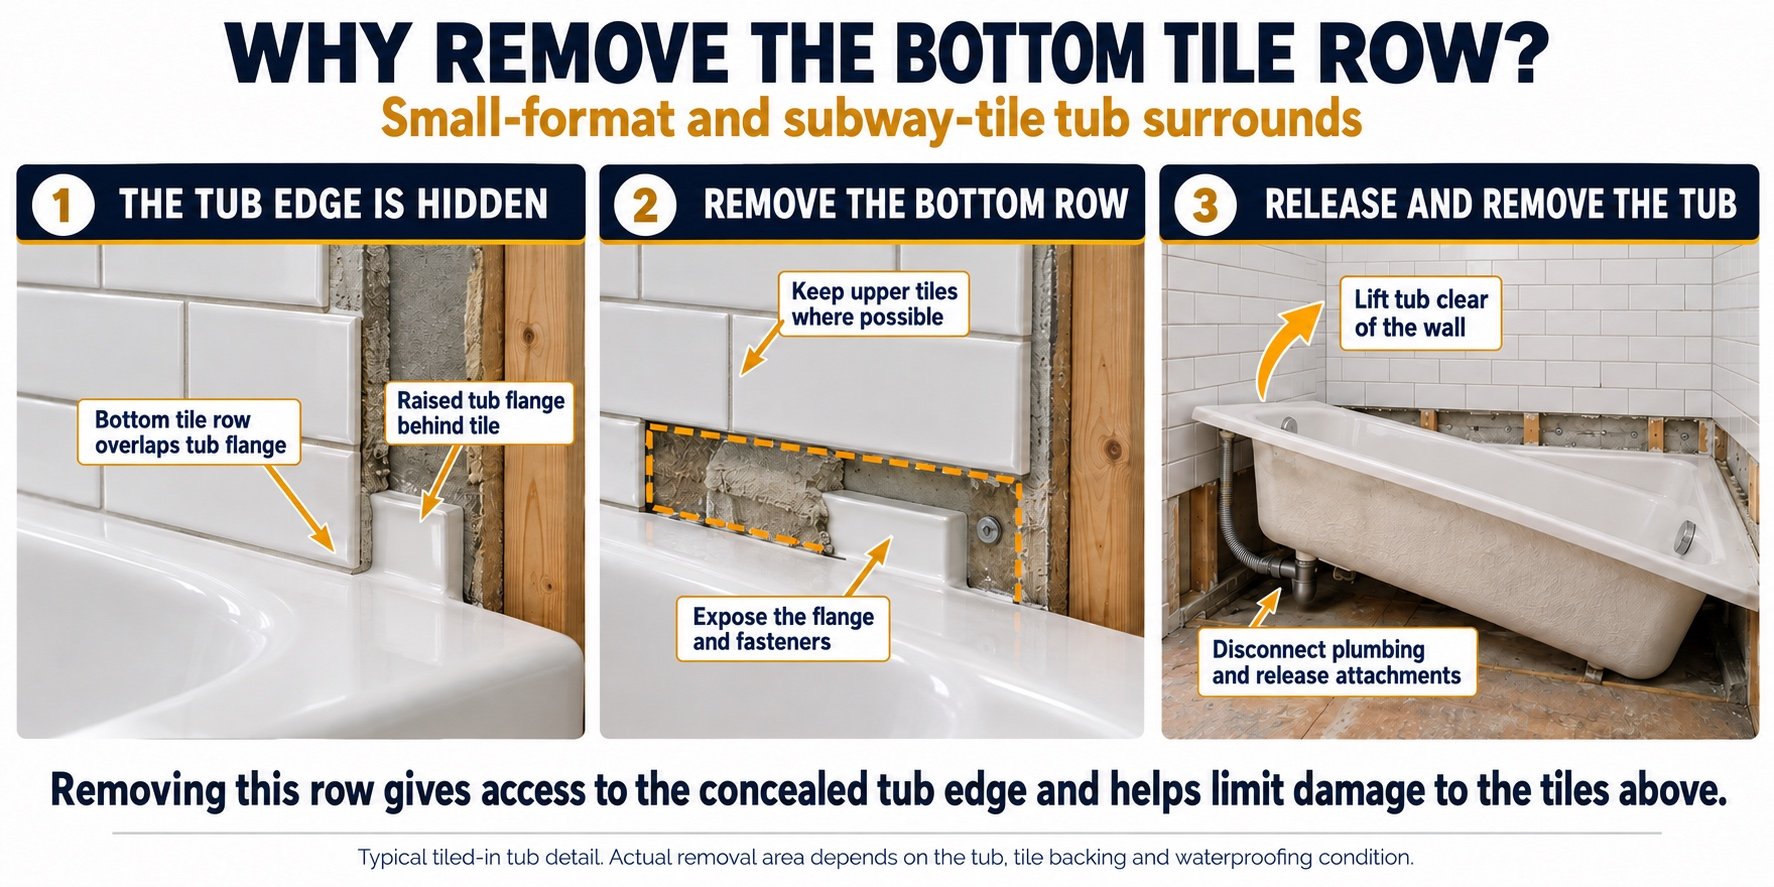
Why remove the bottom tile row: the tub flange is hidden behind the tile, the bottom row is removed to expose the flange and fasteners, then the tub is released and removed
1. The tub edge is hidden. 2. Remove the bottom row. 3. Release and remove the tub.
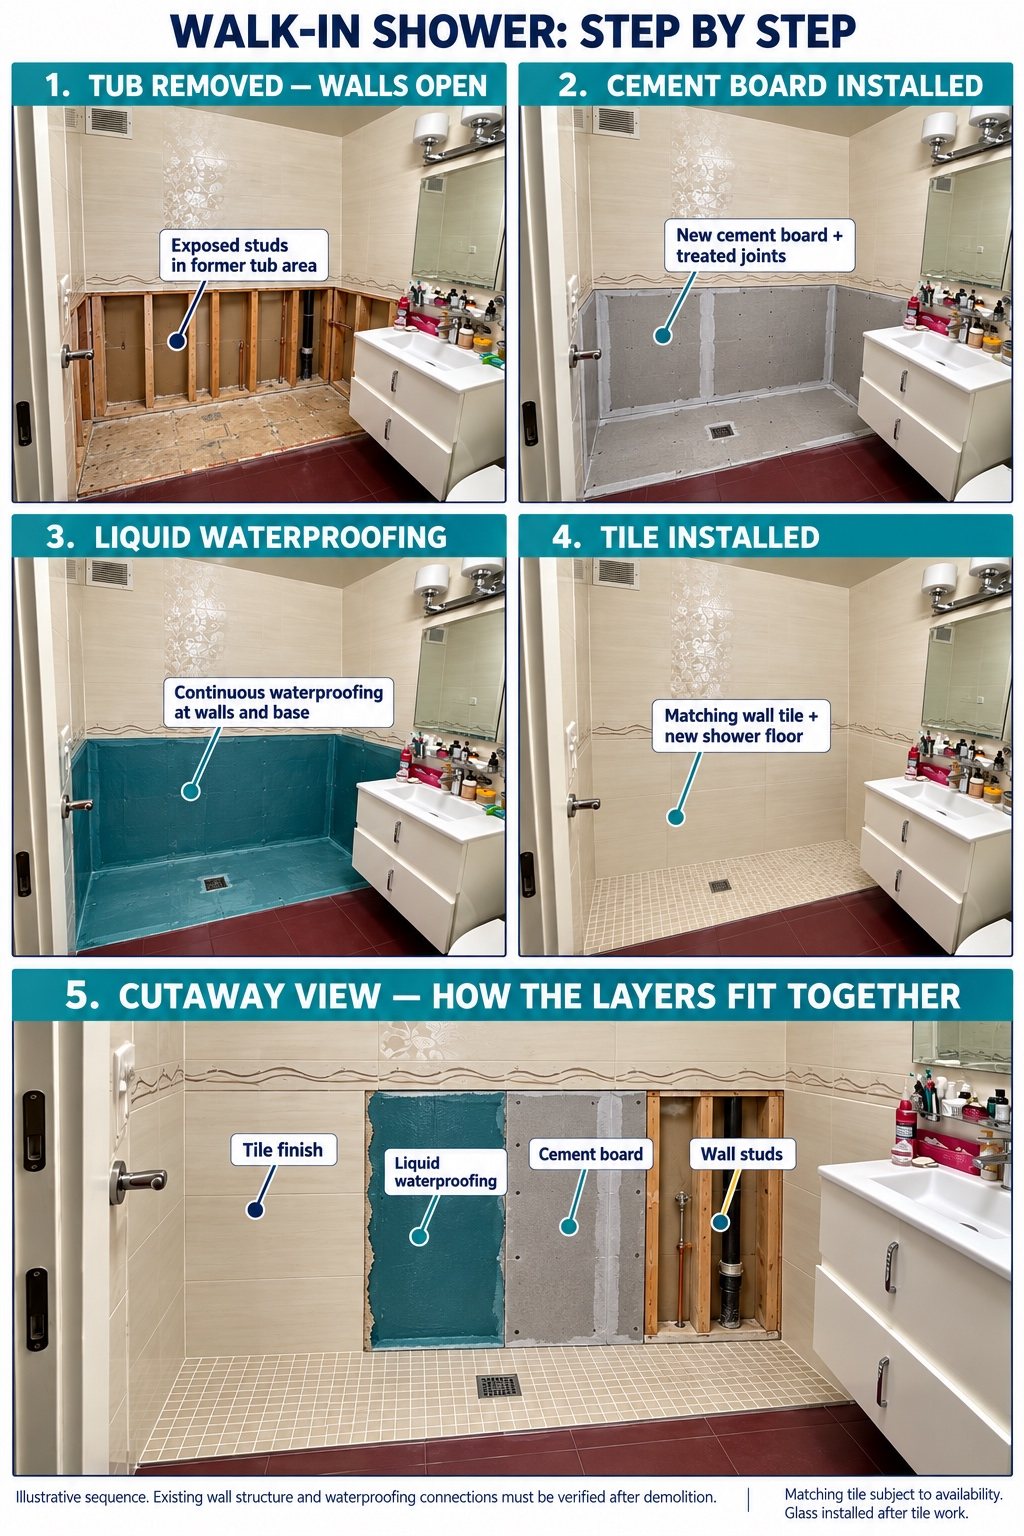
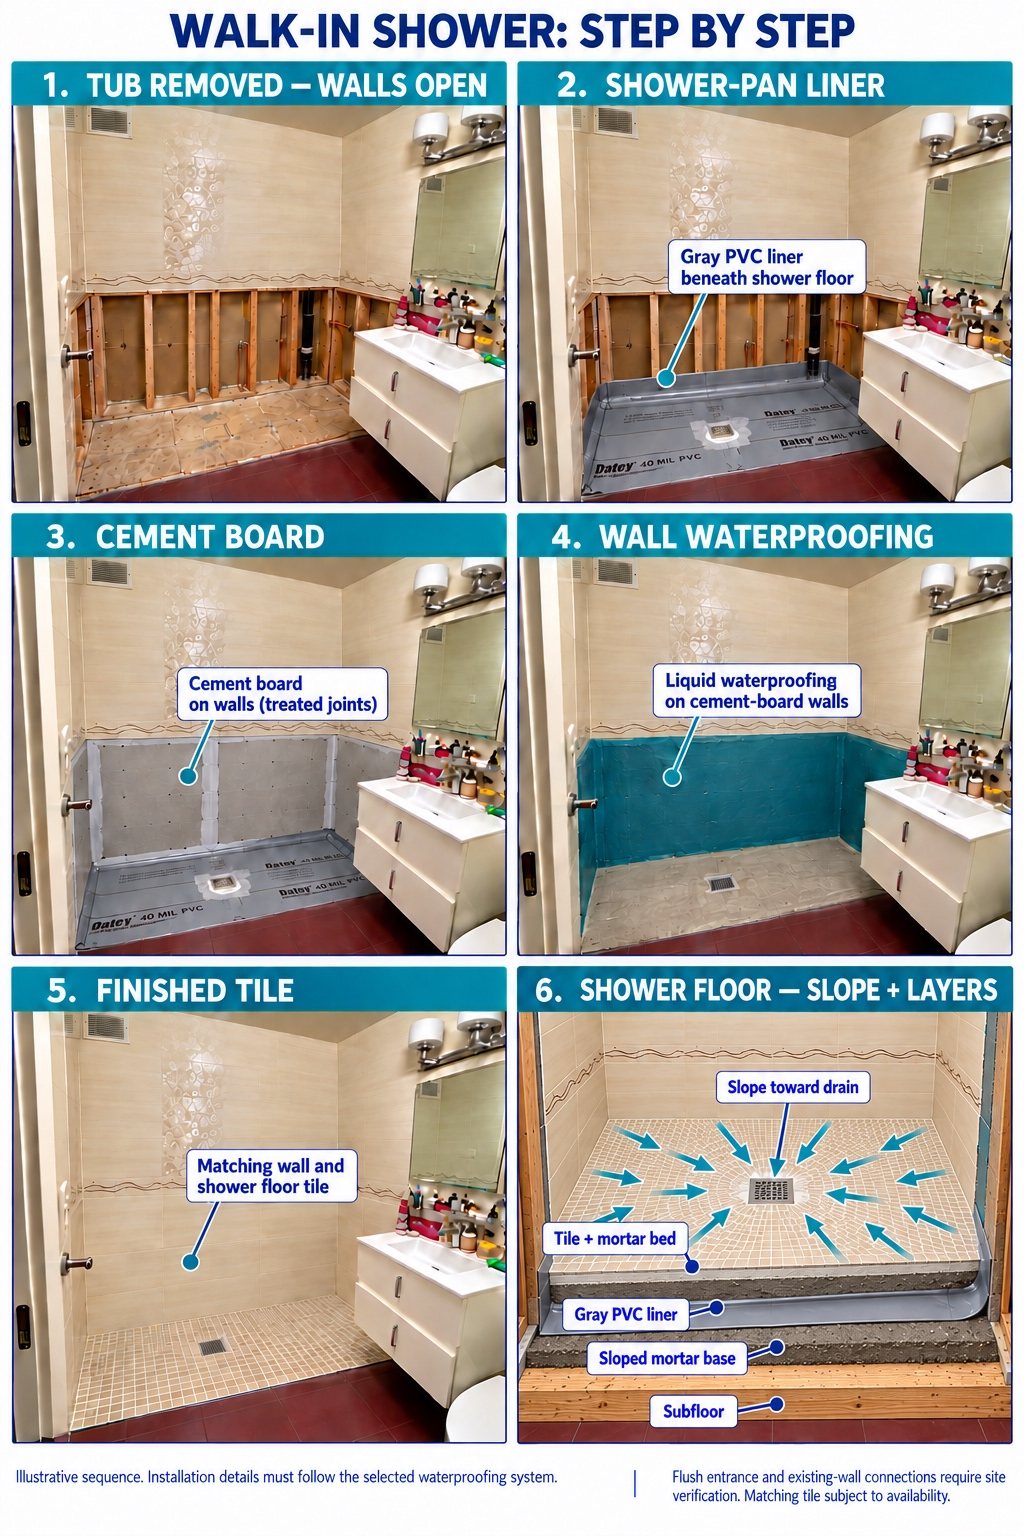
Walk-in shower step by step: tub removed, shower pan liner, cement board, wall waterproofing, finished matching tile and sloped shower floor
Step by step: tub out, pan liner, cement board, waterproofing, matching tile.
Option 2 · Full new look

Replace the tile on all three shower walls

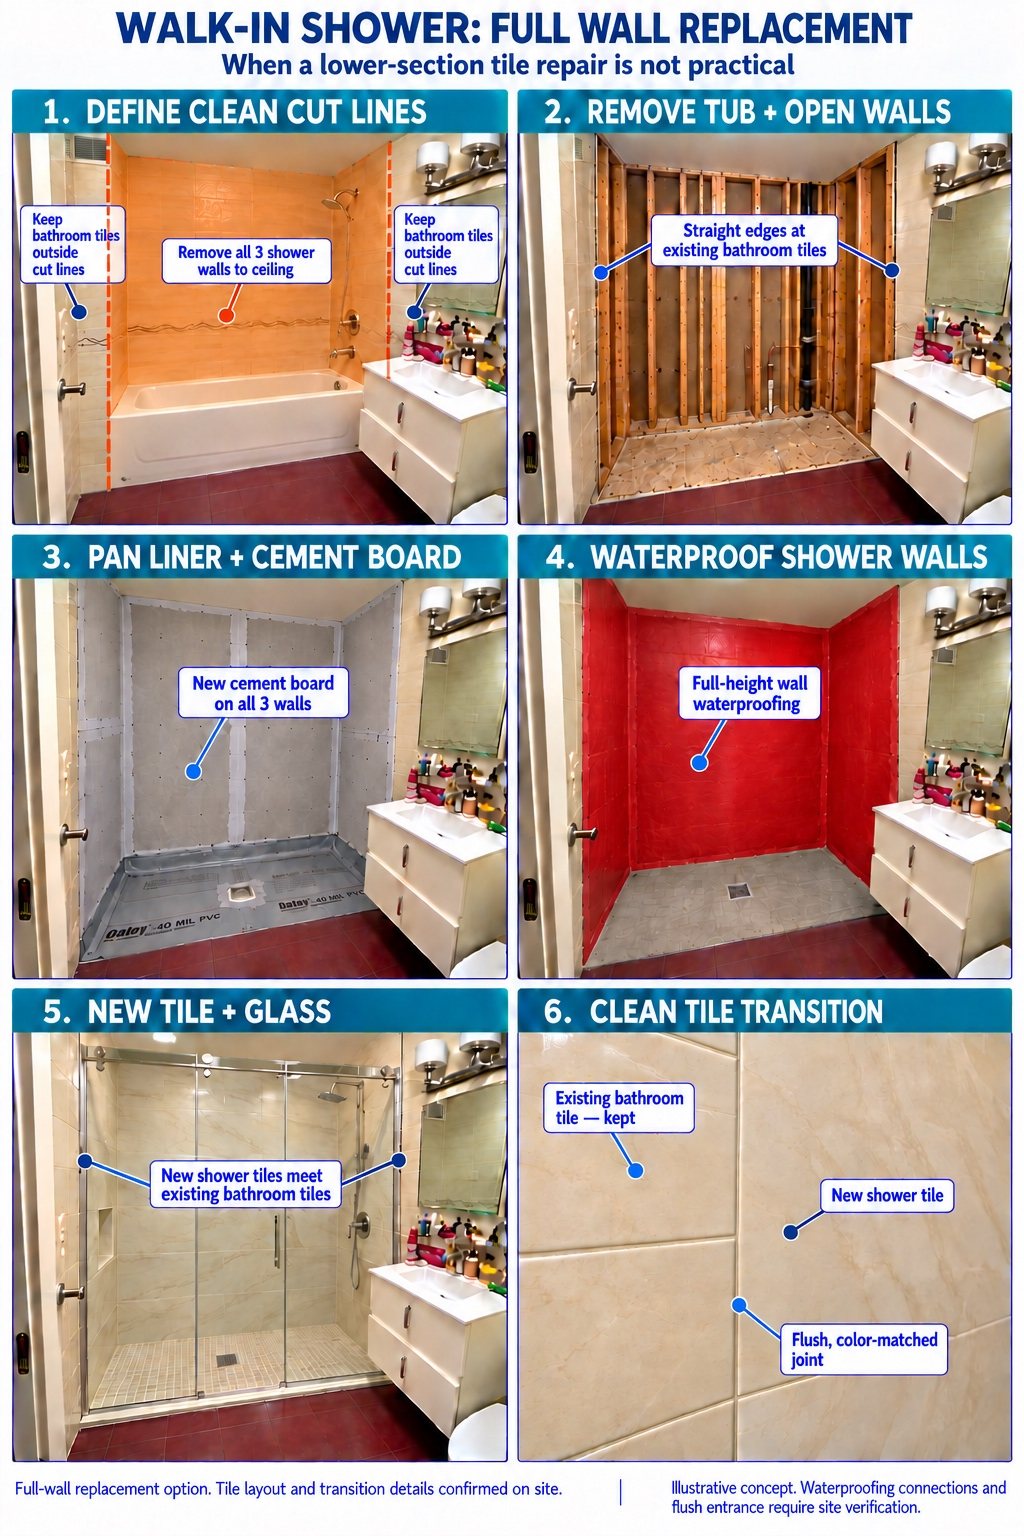
We cut clean lines, remove the tub and the tile on the three shower walls, install new cement board, waterproof the walls to full height and tile them with your new design — we help you choose it, including accent walls and decor tiles — then add the glass.

Needed when: your wall tile is large format, or no matching tile can be found, so a patch would show.

Walk-in shower full wall replacement: clean cut lines, tub and wall tile removed, pan liner and cement board, full-height waterproofing, new tile and glass
Full wall replacement, with a clean, color-matched edge to the rest of the bathroom.
Design your new shower

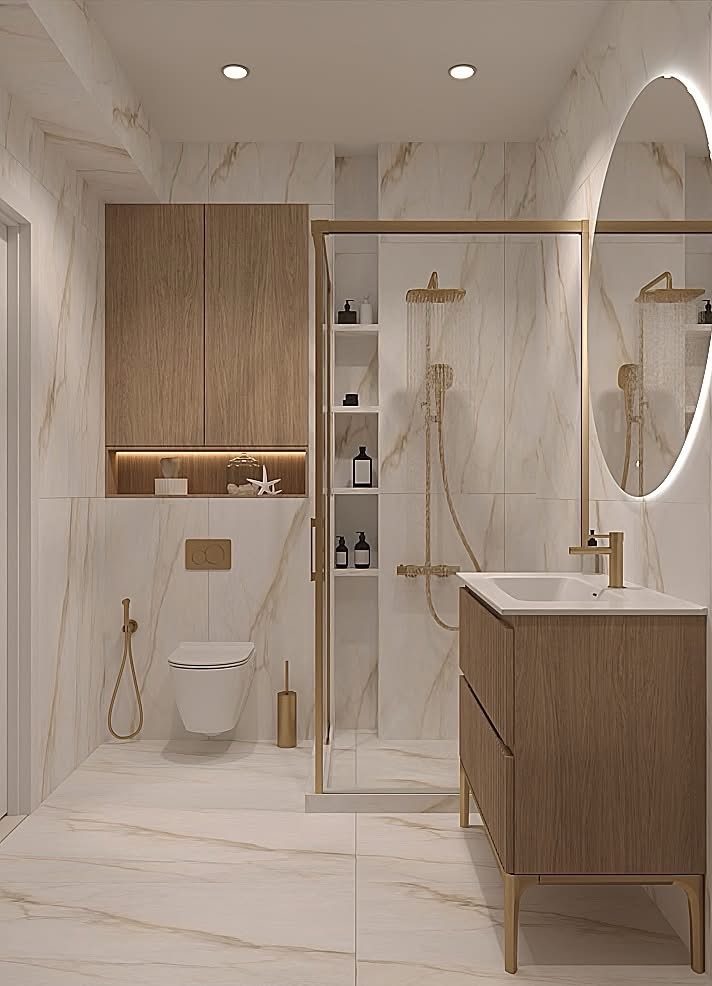
Accent walls and tile combinations, matched to the tile you keep

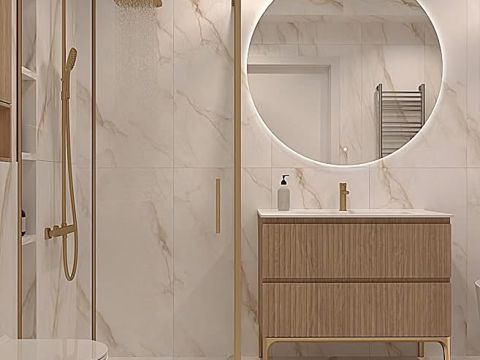
When the tile on the three shower walls comes off, you get to choose a new design. We help you pick tile that works with the tile on your other walls, which stays as it is — we do not touch or demolish it. The result is a modern bathroom without a full renovation.

Two or three colors togetherA main tile with one or two matching colors — today's most popular bathroom look.
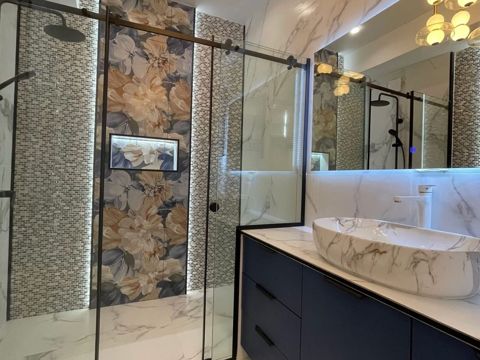
Decor tilesA patterned or botanical decor tile on one wall, or as a band or a niche.
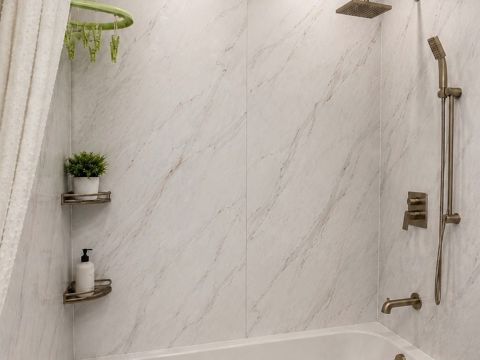
Accent wallOne shower wall in a bold color, stone or marble look, the other walls calm.
Tied to what staysColors, tile size and grout lines chosen to sit well next to the tile we keep.
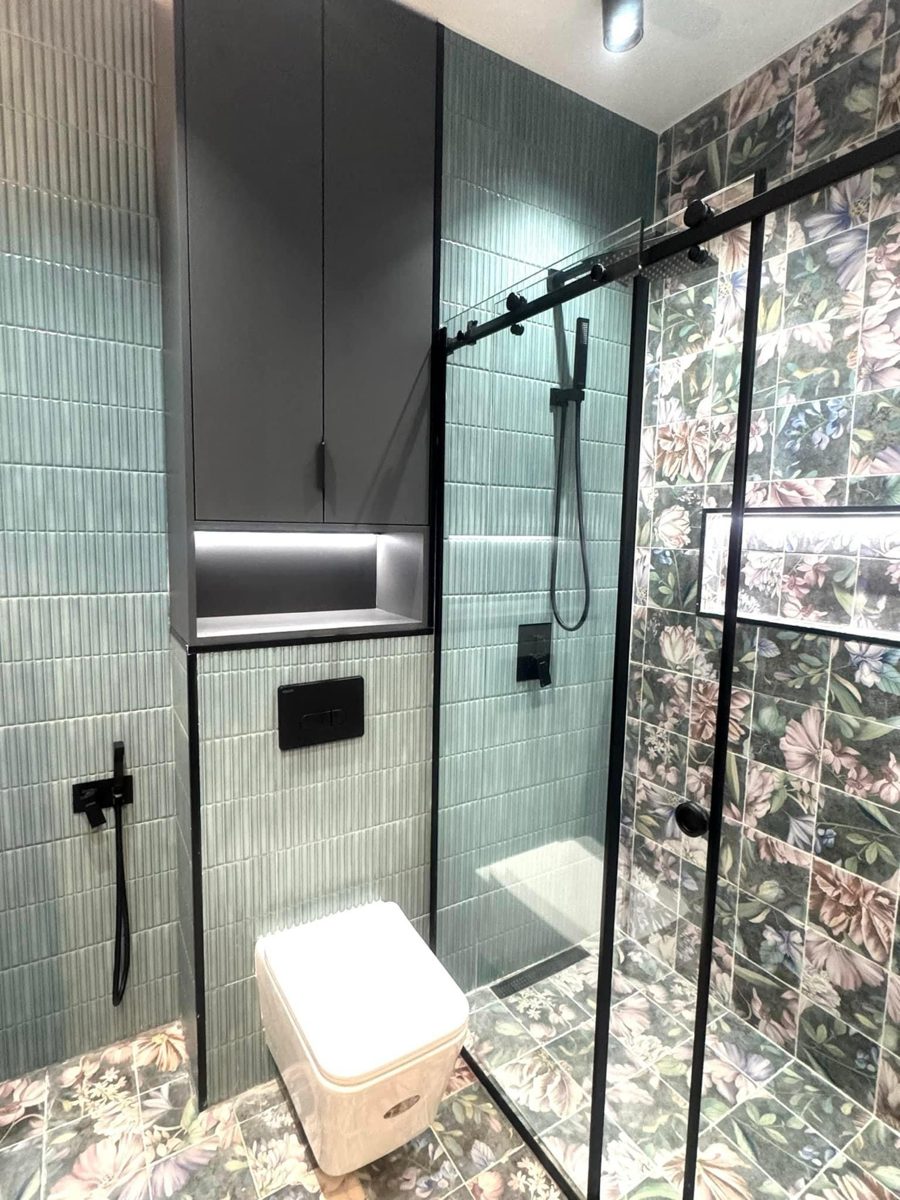
Walk-in shower with green tile and a botanical decor tile accent wall
Green tile with a decor accent wall.
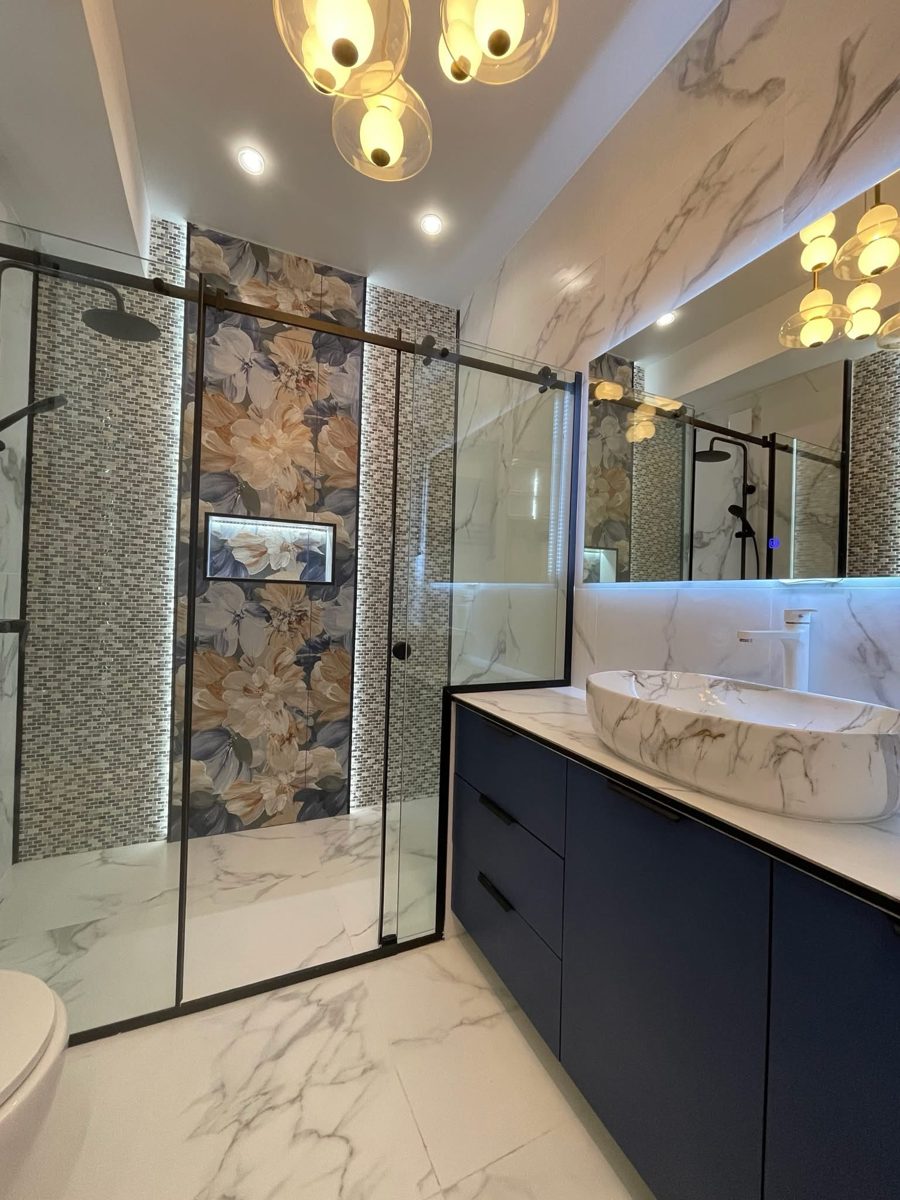
Walk-in shower with a patterned accent wall behind glass and marble-look tile around it
Patterned accent wall, marble-look walls.
Walk-in shower with wood-look accent tile and light stone tile
Wood-look accent with light stone tile.
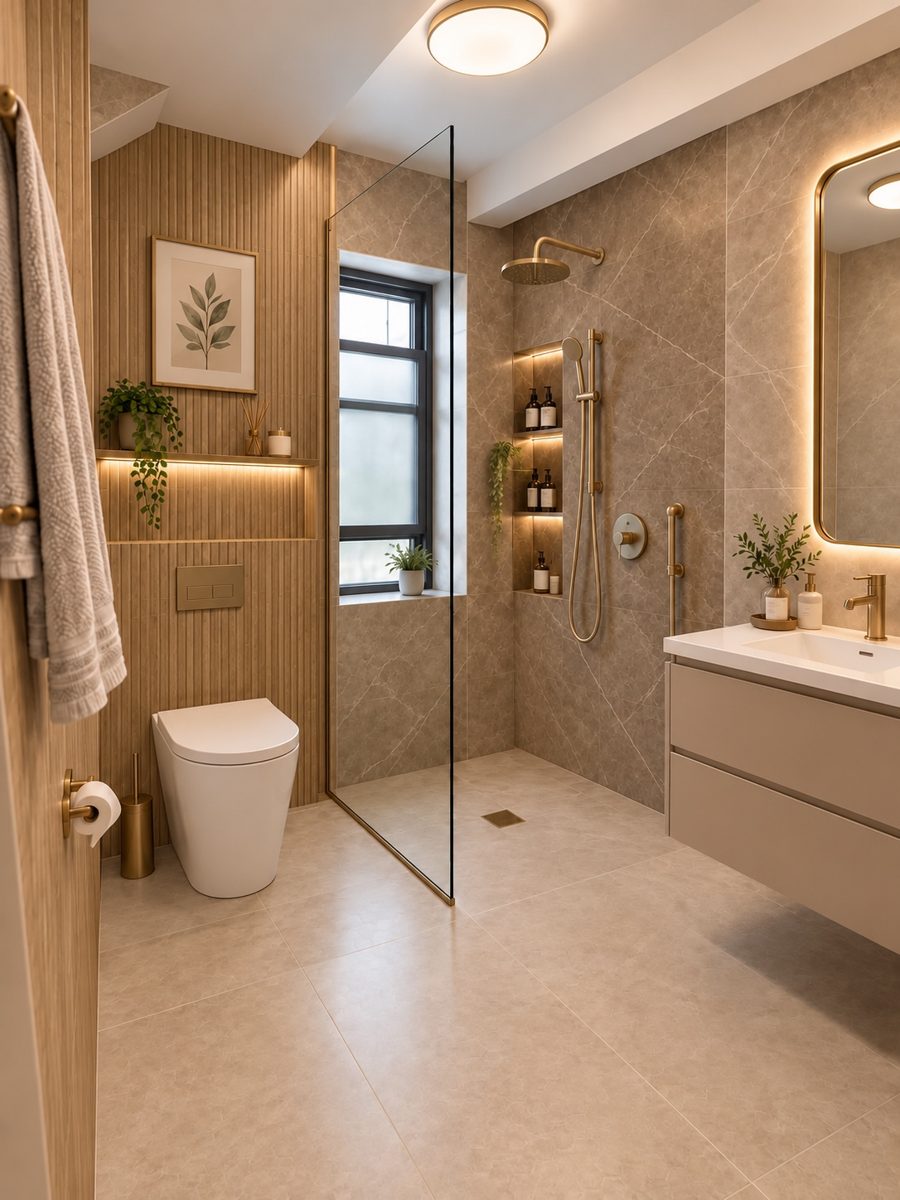
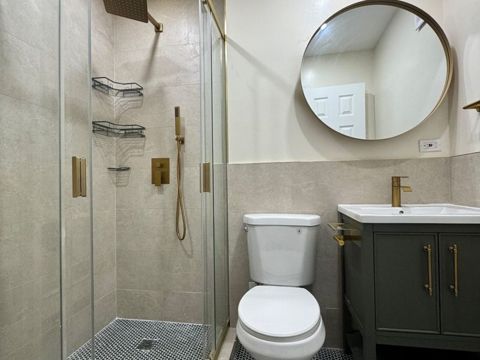
Two-tone walk-in shower with marble-look tile and gold fixtures
Two-tone tile with gold fixtures.
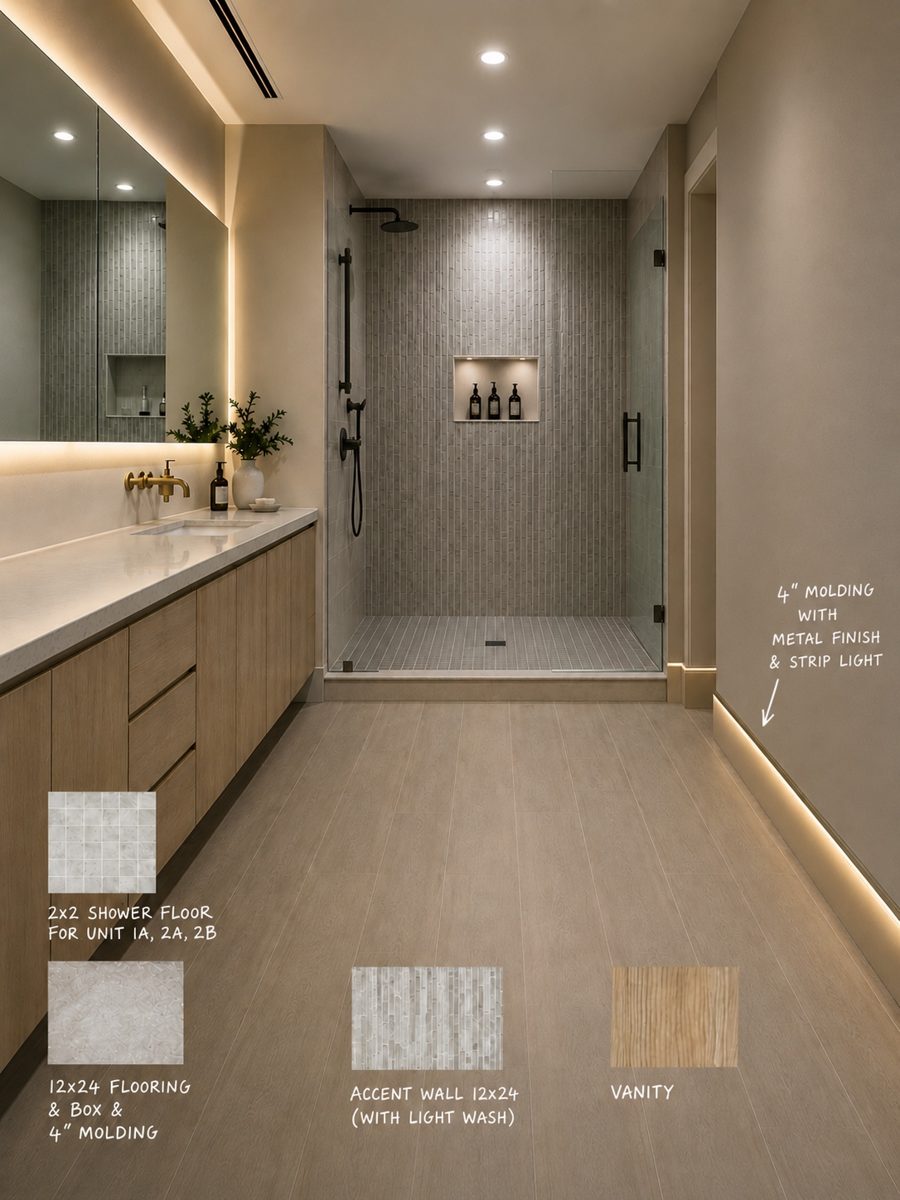
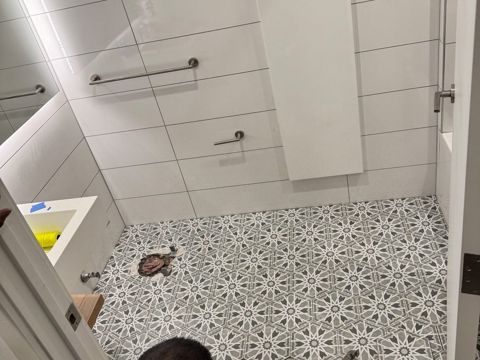
Walk-in shower tile plan with an accent wall tile, shower floor mosaic and matching floor tile
A tile plan: accent wall, shower floor and floor tile.
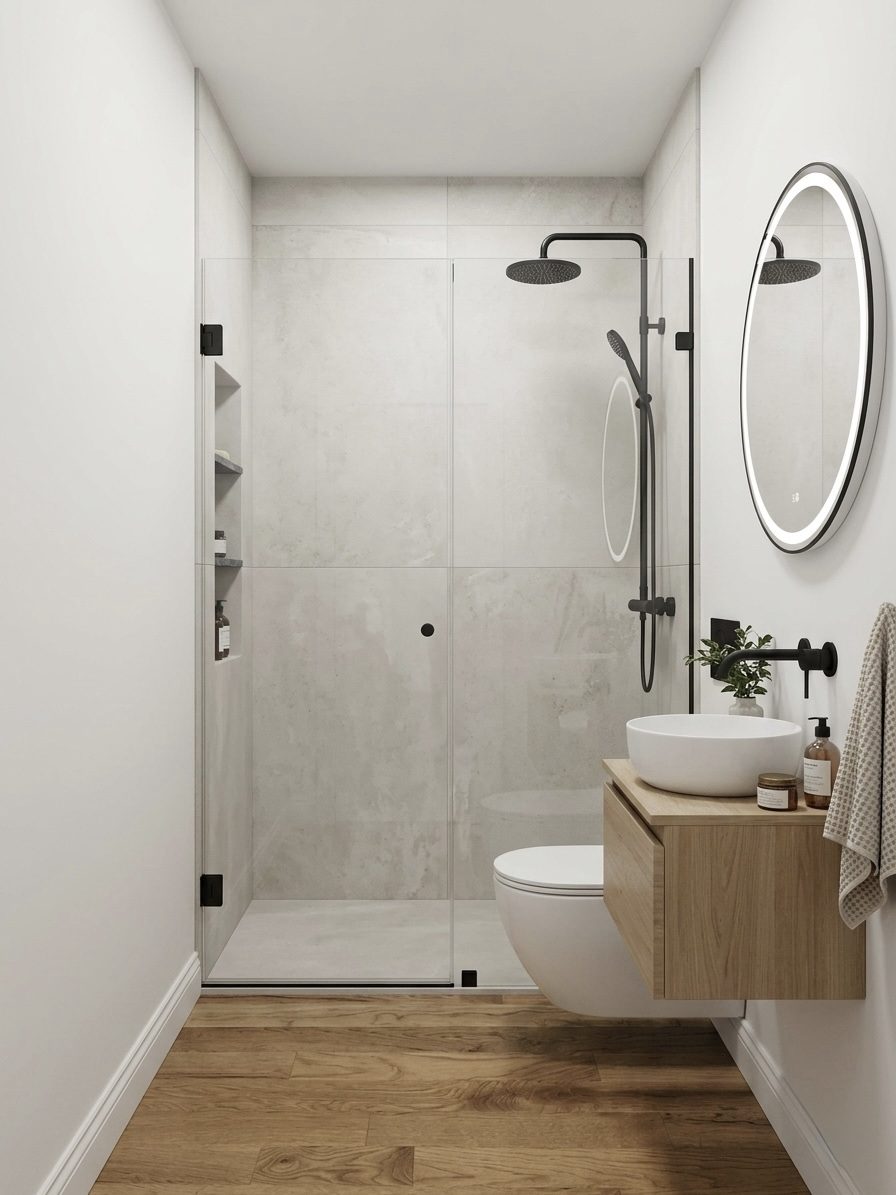
Bright walk-in shower with light wall tile and wood-look floor
Light tile, warm floor.

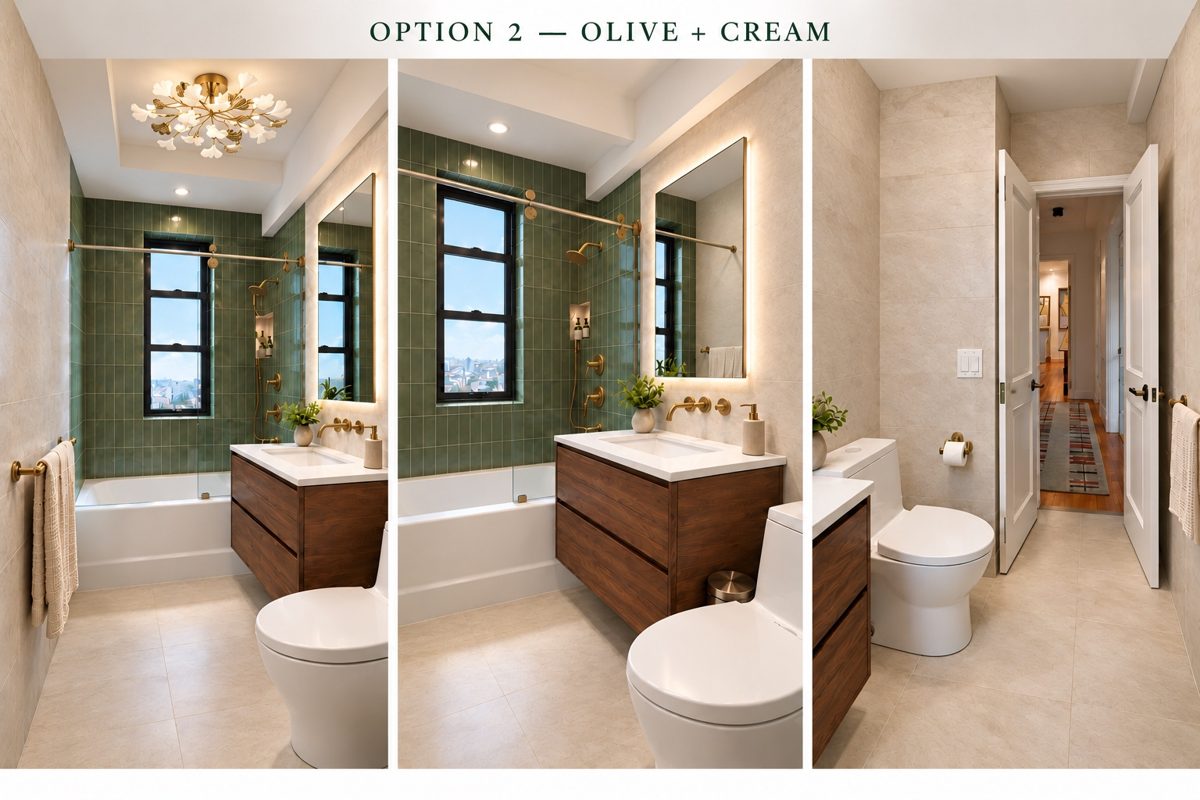
See your options before we start

We show you design options with the colors and tiles side by side, so you can choose with confidence.

Bathroom tile design option with olive green shower tile and cream walls
Design option: olive and cream.
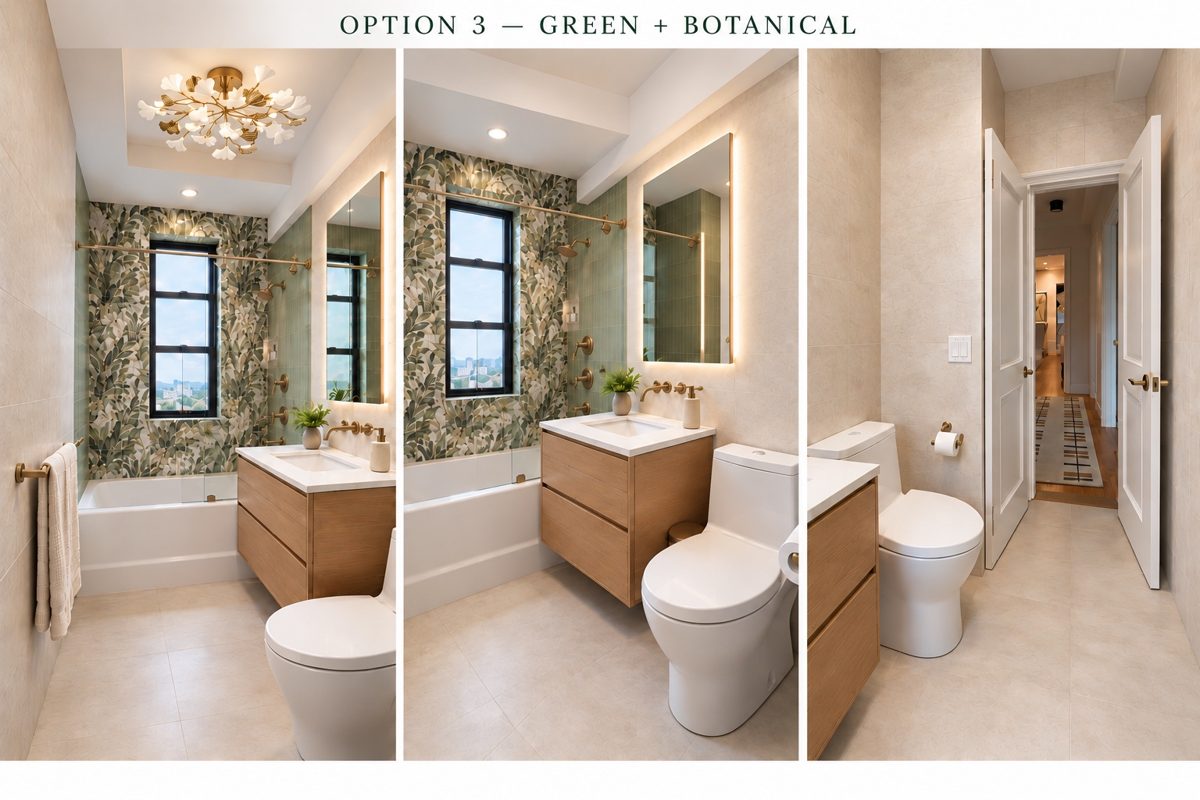
Bathroom tile design option with a green botanical decor accent wall
Design option: green and botanical decor.
What you do not see

What is under the tile

Tile is only the finish. A walk-in shower stays dry because of the layers behind and under it — and that is where we take the most care.

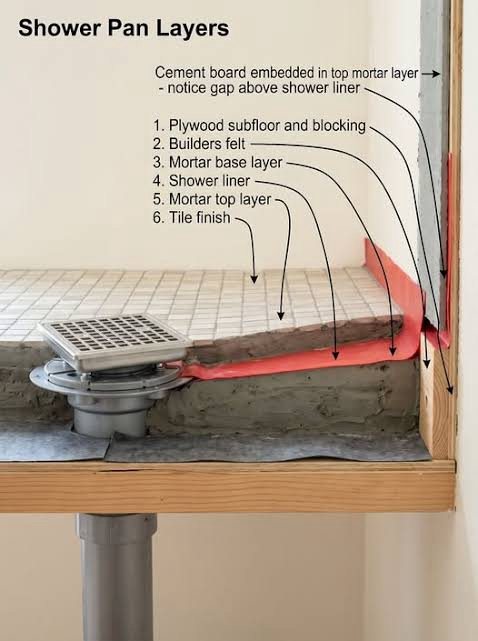
  1. Solid subfloor checked and repaired where the tub was.
  2. Shower liner under the floor, turned up the walls.
  3. Sloped mortar bed so every drop runs to the drain.
  4. Cement board on the walls, joints treated.
  5. Liquid waterproofing on walls and floor, sealed at every corner.
  6. Tile, grout and glass — the part you see.
Walk-in shower step by step with a cutaway view of tile, liquid waterproofing, cement board and wall studs
Cutaway: how the layers fit together.
Shower pan layers: plywood subfloor, builders felt, mortar base, shower liner, mortar top layer and tile
Shower floor layers, from subfloor to tile.
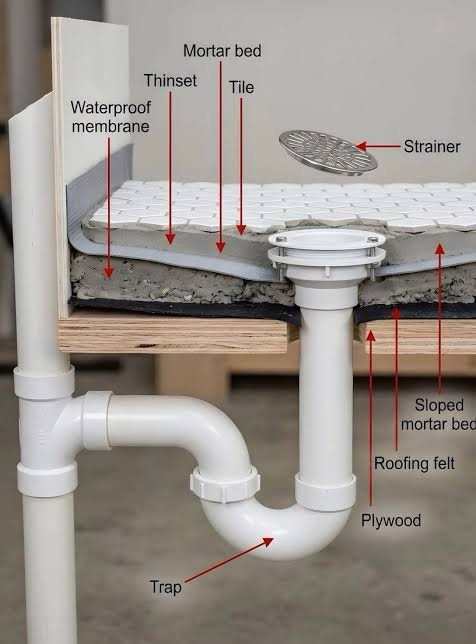
Shower drain cutaway showing waterproof membrane, thinset, mortar bed, tile, sloped mortar bed and drain trap
The drain: where the slope and the waterproofing meet.
How it works

From bathtub to walk-in shower in five steps

You get the price and the schedule in writing before any work starts.

1

Free estimate

We look at the tile, the floor and the drain, and tell you which option fits.

2

Written price

A fixed price and schedule — tile choice, entrance, glass and extras included.

3

Tub out

Tub and tile removed. Halls and floors protected, debris taken away.

4

Build & waterproof

Liner, sloped floor, cement board and waterproofing, sealed at every seam.

5

Tile, glass & safety

Tile, glass door or panel, grab bars and bench — then a final walkthrough with you.

Keeping the tub?

Want to keep your tub but fix the walls?

If you like your tub and only the walls around it are old, cracked or leaking, waterproof vinyl wall panels go right over the old tile in 1–3 days, with no demolition.

See bathroom wall panels (no demo)

Get a free walk-in shower estimate

Send us a photo of your tub and the wall tile, or call us. We will tell you which option your bathroom needs and what it costs. Serving Brooklyn and all five NYC boroughs, plus Long Island and Nassau County.

Good to know

Frequently asked questions

Yes. We take out the tub, build a new waterproofed shower floor that slopes to the drain, waterproof the walls, tile it, and finish with a glass door or panel. Most NYC bathrooms with a standard tub alcove can be converted.

A bathtub has a raised edge, called the flange, that is fastened to the wall studs and hidden behind the bottom row of wall tile. To release the tub we have to reach that edge and its fasteners. Removing only the bottom row gives that access and helps protect the tiles above. How much tile comes off depends on the tub, the wall behind the tile and the condition of the waterproofing.

Not always. If your wall tile is small, like subway tile or small squares, we can often remove only the tub and the bottom rows of tile and continue with a matching tile, so the upper walls stay. If the tile is large format, or no exact match can be found, we replace the tile on the three shower walls so the new shower looks clean and finished. We tell you which one your bathroom needs at the estimate.

Yes, that is the main reason many of our customers convert. There is no tub wall to step over. We can build a low or flush entrance where the floor and drain allow, and add grab bars, a shower bench, a handheld shower and a slip-resistant floor tile.

Often a low or flush entrance is possible. It depends on the floor structure and where the drain can go, which we check before we price the job. If a fully flush entrance is not possible, we build the lowest curb the floor allows.

Yes. When the tile on the shower walls is replaced, we help you choose a new design that works with the tile that stays on the other walls, which we do not touch. Many customers now choose two or three tile colors together — a main tile with a decor tile or an accent wall — for a modern look without redoing the whole bathroom. We show you the design options before any work starts.

Keeping the upper walls is the faster option. Replacing the tile on all three walls takes longer because the walls are rebuilt and waterproofed to full height. The waterproofing and the shower floor also need time to cure before the tile goes on. You get the schedule in writing with the price.

A shower liner under a mortar floor that slopes to the drain, cement board on the walls, and a continuous liquid waterproofing layer on the walls and floor, sealed at every corner and seam. The tile is the finish; the waterproofing behind it is what keeps the water in.

Yes. Most of our shower work is in NYC apartments, co-ops and condos. We protect the halls, follow the building's work rules and hours, and can send the insurance certificate your board or management company asks for.

Yes. Sani Building Corp is fully insured, and our shower work carries a 3-year workmanship warranty.

Sani Building Corp is based in Brooklyn and serves all five NYC boroughs — Brooklyn, Manhattan, Queens, the Bronx and Staten Island — plus Long Island and Nassau County.

Contact Us 332-277-0990Call us now Free EstimateReply within 24 hours